I recently enabled Cloudflare on my website and found that Filezilla would not connect and would repeatedly give me the same messages over and over again:
Error: Connection timed out after 20 seconds of inactivity
Error: Could not connect to server

Ad infinitum.
I’m no programmer, so I had no clue as to what I needed to do. Thankfully, after an hour of frustrated attempts and research, I discovered that I needed to change some settings in Filezilla, Cloudflare, and even in CPanel, which my server uses.
Before I get to the solution, there’s an important step in this process: Make sure you have your server’s IPv4 address.
Your Server’s IPv4 Address
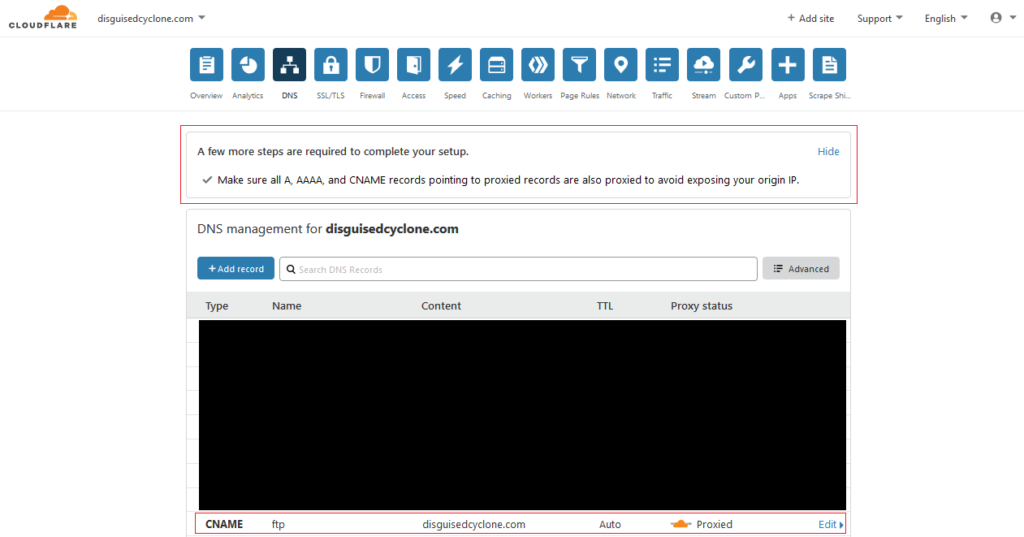
The simplest explanation as to why your FTP isn’t working is because Cloudflare is proxying it – which basically means that they’re changing it in order to hide your real IP addresses. Filezilla reads the updated, proxied FTP address that Cloudflare gives it instead of the original one that links to your server – which is what Filezilla needs in order for it to work.

Filezilla isn’t working because the original FTP address is being proxied away by Cloudflare. It’s basically protecting you from yourself.
In order to get Filezilla to work then, you’re going to need the server’s IPv4 address.
You may have gotten it when you set up your server, so it would be a good idea to check around for it. You can also contact your provider for it, or do what I did and simply grab it off Cloudflare.
I simply looked into the IPv4 address noted for my website and took careful note of it. That’s the address I used to get Filezilla to work for me.

Fun fact: I use A Small Orange for my server, and the email I got from them for setup had a couple of IP addresses listed. None of them worked for Filezilla. Good ol’ Cloudflare to the rescue.
The Simplest Solution: Use Your Server’s IPv4 on Filezilla
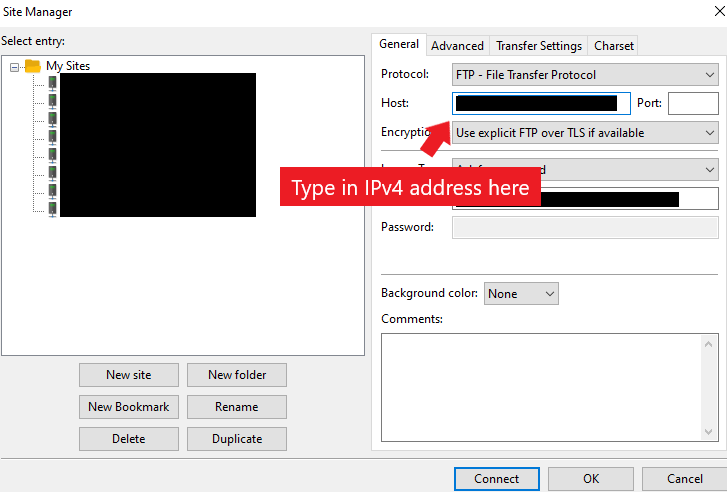
Now that you got a hold of your server’s IPv4 address, open up Filezilla and type it into the Host: field, changing what would have probably been your *ftp.mysite.com* address.

This is what it would look like if you want to change your entries via Site Manager. You could also likely use it on the quickconnect bar, but I tend to switch websites often because I’m a swinger like that.
Click Connect and it should work, just like that.
Hurrah, you’re connected!
Bonus: There’s Only .ftpquota in Here!
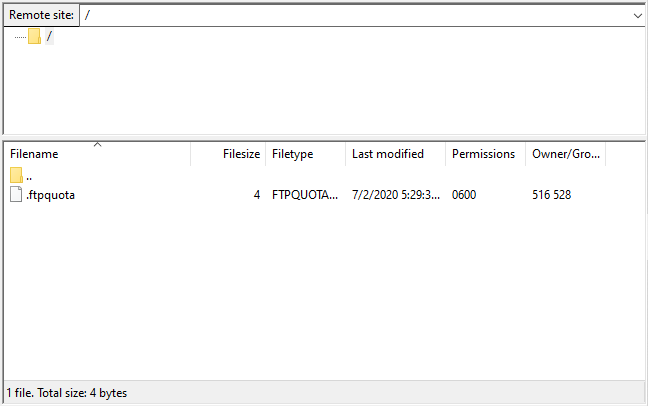
So imagine my surprise when I opened up Filezilla, and instead of seeing all my site’s files, I only saw one: a lonely file called .ftpquota.

Where did all my stuff go?!?!?!
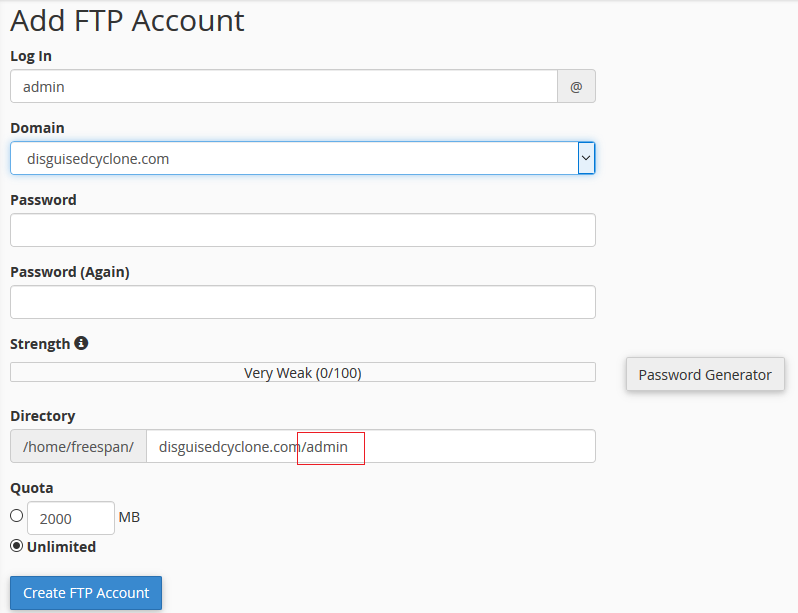
I then realized that in my attempts to fix my FTP connections, I was constantly creating and deleting FTP accounts on CPanel. This shifted some things around, particularly this little thing:

Apparently, whenever I added a new FTP account (without deleting the directory, I’d say), it would make another folder in the directory and allocate the file .ftpquota in it.
The simple solution is to remove that little piece of text at the end of the Directory field.
I hope this article saves you some time and effort, and prevent you from the rage and frustration I went through while working on this. Cheers!
Thank you. You are incredible.
Hello DC:
Thank you so much for writing this article.
Best wishes, Mitchell